Quick Summary
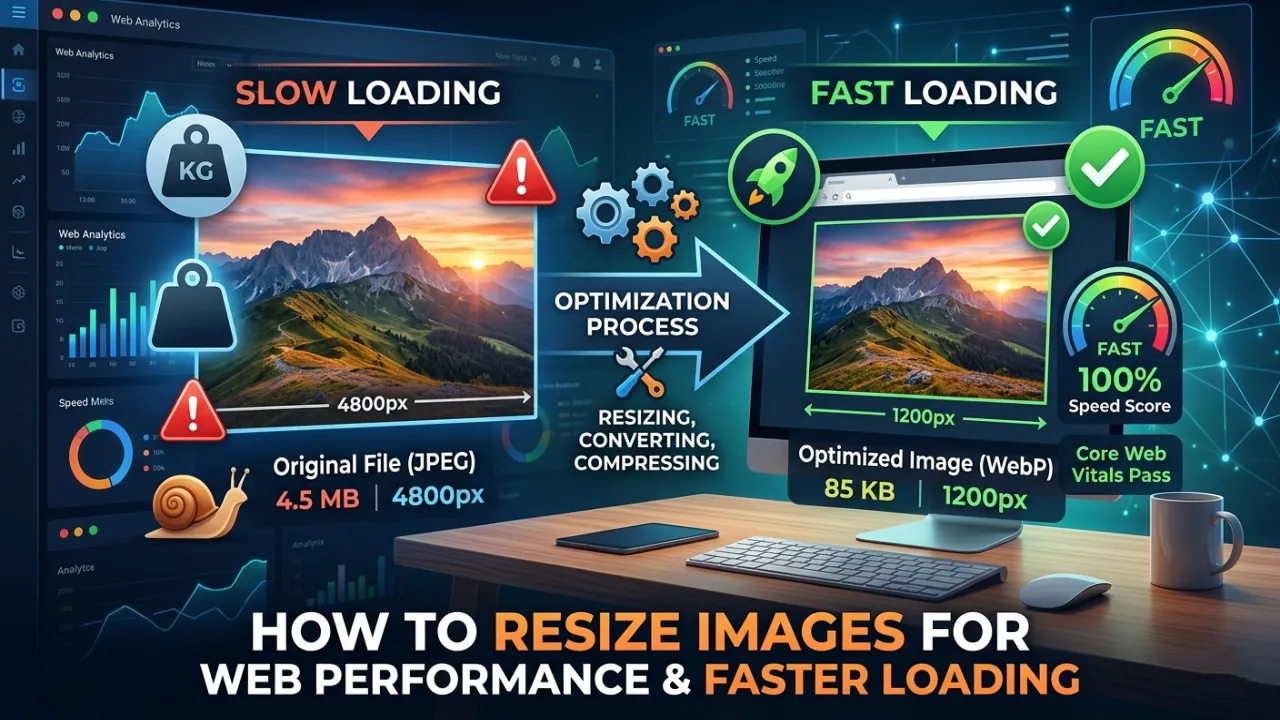
Large, unoptimized images are the number one reason websites load slowly. To fix this, you must resize images for web performance before uploading them.
This involves changing the physical dimensions (pixels) to match your website’s container, converting them to next-gen formats like WebP or AVIF, and compressing the file size without losing quality. Therefore, properly sized images will dramatically improve your Core Web Vitals, lower bounce rates, and boost your overall SEO rankings.
Table of Contents
Resize Images for Web Performance and Faster Loading
Visual content is essential for engaging your website visitors. However, large media files are the biggest enemies of page speed. If your website takes more than three seconds to load, you are losing traffic, sales, and search engine rankings.
Most website owners upload original, massive photos directly from their cameras or stock photo sites. This is a critical error. You must resize images for web performance to ensure a smooth, lightning-fast user experience.
In this highly detailed guide, we will break down exactly how to optimize your media. You will learn the difference between resizing and compressing, the best next-gen formats to use, and the exact steps to improve your site’s speed.
Why Is It Crucial to Resize Images for Web Performance?
Search engines like Google prioritize fast websites. When you resize images for web performance, you are directly improving your technical SEO. Large files consume massive bandwidth and force visitors’ browsers to work overtime.
In addition, heavy images negatively impact your Core Web Vitals. Specifically, they ruin your Largest Contentful Paint (LCP) score, which measures how quickly the main content of your page becomes visible.
Let’s look at the data. According to standard web performance statistics, images make up over 60% of the total page weight on average. If you do not control this weight, your server response times will plummet.
The Impact on User Bounce Rates
- Pages that load in 1 to 2 seconds have an average bounce rate of 9%.
- If load time jumps to 5 seconds, the bounce rate spikes by 38%.
- Consequently, mobile users will abandon your site instantly if large images block the content from loading.
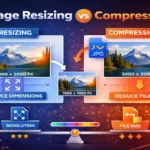
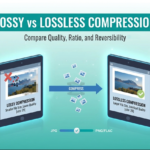
Image Resizing vs Image Compression – What is the Difference?
Many webmasters confuse resizing with compression. To fully resize images for web performance, you actually need to understand both concepts. They work hand-in-hand to reduce your overall file size.
Image Resizing changes the physical dimensions of the photo. For example, scaling a 4000×3000 pixel image down to 1200×900 pixels. You should never upload an image wider than your website’s maximum container width.
You can use professional Image Resizer Tools to resize your images to any size you want without loosing quality.
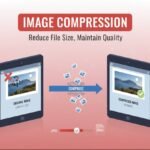
Image Compression reduces the file size (kilobytes or megabytes) by removing hidden data and unnecessary color profiles. Therefore, you should always resize the dimensions first, and then compress the file.
You can use high end image compression tools that can compress images file size without effecting quality.
Types of Compression
- Lossless Compression: Reduces file size without any loss in visual quality. Best for graphics with text.
- Lossy Compression: Removes some pixel data to drastically reduce the file size. Best for standard photographs.
Best Image Formats for Faster Loading
Choosing the correct file type is just as important as the physical dimensions. If you want to resize images for web performance, you need to abandon outdated formats where possible.
Here is a quick comparison table to help you decide:
| Image Format | Best Used For | Quality | File Size | SEO Impact |
| WebP | Website photos, banners | High | Very Small | Excellent |
| AVIF | Next-gen web photos | Very High | Smallest | Outstanding |
| JPEG / JPG | Standard photographs | Good | Medium | Good |
| PNG | Graphics with transparency | Perfect | Very Large | Poor (if misused) |
| SVG | Logos, icons, vectors | Scalable | Tiny | Excellent |
Pro Tip: Converting older formats to next-gen formats is highly recommended. You can use a dedicated JPG to WebP converter to instantly upgrade your image delivery.
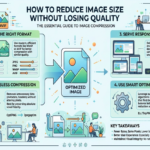
Step-by-Step Guide: How to Resize Images for Web Performance
Optimizing your media does not have to be complicated. By following a strict pre-upload routine, you will keep your server clean and your website fast. Here are the exact steps to resize images for web performance.
Step 1: Identify Your Maximum Display Width
First, find out the maximum width of your website’s content area. For most modern WordPress blogs, the content area is between 800px and 1200px wide.
Therefore, there is no reason to upload an image that is 3000px wide. The browser will waste time shrinking it down to fit the screen. Always crop and scale your dimensions to match your layout.
Step 2: Convert to the Right Format
Once you have the right dimensions, convert the file. If you have a heavy PNG file that does not need a transparent background, convert it immediately.
Using a PNG to JPG or WebP to PNG tool ensures you have the exact format needed for your specific use case.
Step 3: Compress the File Size
After resizing and converting, run the file through an image compressor. Aim for a final file size under 100KB for standard images, and under 30KB for smaller graphics.
A dedicated Image Compressor tool will strip out EXIF data (camera details, GPS locations) that your website visitors do not need to download.
Step 4: Implement Lazy Loading
Finally, ensure lazy loading is active on your site. Lazy loading tells the browser to delay loading images until the user actually scrolls down to them.
Moreover, this saves massive amounts of initial bandwidth and drastically improves your Time to First Byte (TTFB).
")
Top Tools to Automate Your Workflow
You do not need expensive software like Photoshop to optimize your media. There are excellent web-based tools and plugins available. To efficiently resize images for web performance, consider adding these to your toolkit.
Dedicated Web Tools
Using browser-based processors is the fastest way to prepare images before they ever touch your server.
- Image Resizer Tools: Quickly scale down pixel dimensions in bulk.
- Format Converters: Seamlessly swap formats using JPG to PNG or WebP to JPG tools depending on browser support.
WordPress Optimization Plugins
If you manage a WordPress site, plugins can automate the process upon upload.
- LiteSpeed Cache: Offers built-in image optimization and WebP replacement.
- ShortPixel / EWWW Image Optimizer: Automatically compress files and serve them via a Content Delivery Network (CDN).
- Note: Always configure your plugin’s
functions.phpor settings panel carefully to avoid double-compressing images, which causes blurriness.
Common Mistakes When You Resize Images for Web Performance
Even experienced web developers make mistakes when handling media. Avoid these common pitfalls to ensure maximum performance.
- Relying on HTML/CSS to Resize: Uploading a 4000px image and using CSS to display it at 400px is a massive error. The user still downloads the full 4MB file.
- Ignoring Mobile Users: A desktop banner might look great, but it will crush a mobile user’s 3G/4G connection. Serve adaptive image sizes.
- Using PNGs for Photographs: PNGs are lossless and uncompressed. Using them for complex, multi-colored photos will result in massive file sizes.
- Forgetting to rename files:
IMG_9948.jpgis terrible for SEO. Rename it tohow-to-resize-images.jpgbefore uploading.
Pro Tips for Advanced Image SEO
If you want to beat the top-ranking Google results, you need to go beyond basic compression. Here are advanced strategies to resize images for web performance and dominate search.
- Use Descriptive Alt Text: Search engines cannot “see” images. Always write clear, keyword-rich Alt Text for accessibility and image search rankings.
- Leverage a CDN: A Content Delivery Network stores copies of your images on servers around the world, delivering them from the location closest to the user.
- Specify Width and Height Attributes: Always include explicit width and height tags in your HTML. This prevents Cumulative Layout Shift (CLS), a key Core Web Vitals metric.
- Use Schema Markup: If you publish articles or recipes, include the primary image in your JSON-LD schema so it appears in rich snippets.
Real Use Case – How Image Optimization Boosted Traffic
Let’s look at a real-world scenario. A popular eCommerce store was struggling with an average page load time of 6.5 seconds. Their product pages contained dozens of uncompressed JPEG images averaging 1.5MB each.
They decided to strictly resize images for web performance. They implemented a bulk Image Resizer to cap all product photos at 1000px wide.
Next, they converted the catalog to WebP format.
- Result 1: Total page weight dropped from 12MB to 1.8MB.
- Result 2: Page load time plummeted to 1.4 seconds.
- Result 3: Within two months, organic search traffic increased by 40% due to improved Core Web Vitals, and their conversion rate doubled.
(Source: Standard industry web performance case studies).
Frequently Asked Questions (FAQ’s)
Conclusion
Website speed is no longer a luxury; it is a strict requirement for online success. If you want to rank higher, keep visitors engaged, and increase conversions, you must make optimization a priority.
When you resize images for web performance, you are taking the single most effective step toward a blazing-fast website. Remember to always scale your dimensions, choose next-gen formats like WebP, and compress your files aggressively. By integrating Dedicated image tools into your daily workflow, you will build a leaner, faster, and more profitable website.


Leave a Reply